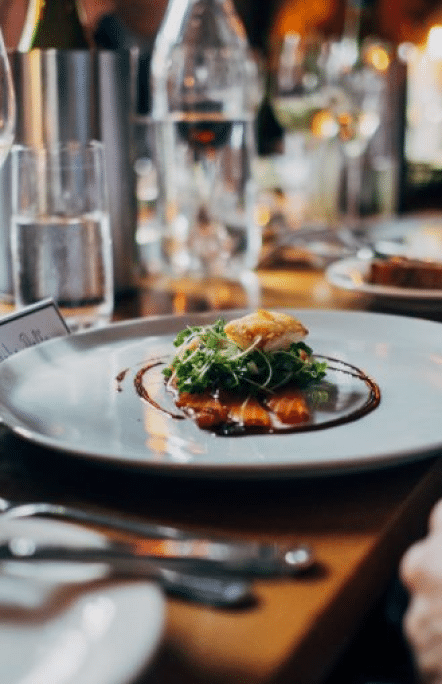
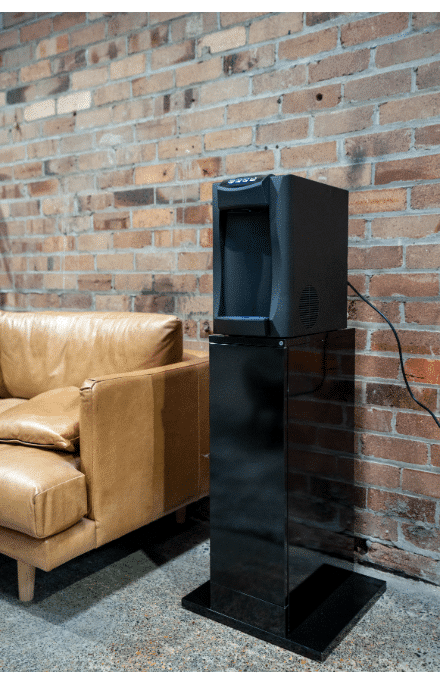
Improve sustainability, cutcosts, and boost efficiency with our innovative water systems. Say goodbye to the high costs and environmental impact of bottled water. Our systems deliver unlimited chilled, still and sparking water directly on-tap. It’s compact, powerful, and includes complimentary bottles. Perfect for Cafe’s, restaurants and barslooking to offer superior water quality to their customers. Click to revolutionise your water service and lead the way in eco-friendly hospitality.
Enhance sustainability, streamline costs and delight your staff and clients alike with our advanced water systems. Bid farewell to the excessive expenses and environmental toll of bottled water. Our efficient systems provide unlimited chilled, still, and sparkling water on-tap. Compact yet robust, they come with complimentary bottles, perfectly suiting Office, Health and Beauty, environments. Ideal for companies committed to offering premium water quality without the hassle. Click to transform your workplace’sbeverageoffering.
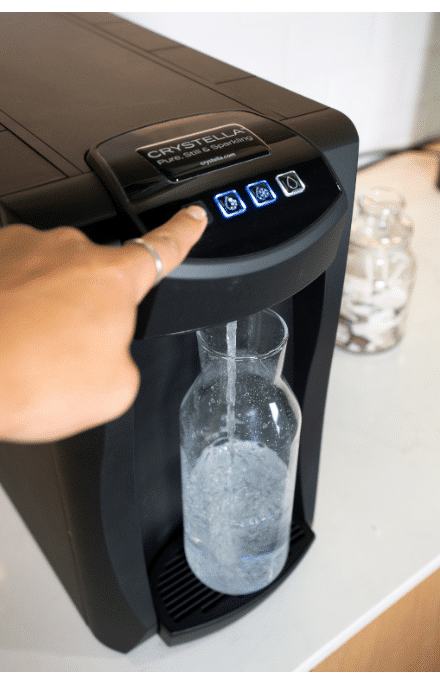
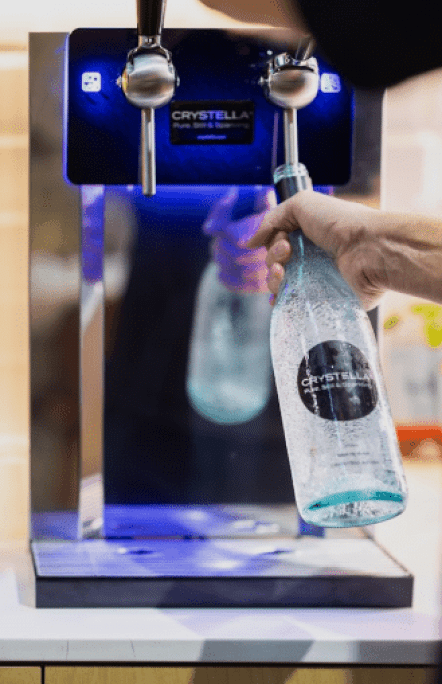
The Crystella on-tap sparkling water system is a profitable choice. With average costs as low as $0.13 per serving, in comparison to bottled water that sells on average for $3-$5, it’s a smart financial move for businesses. At Crystella, we believe that choosing our on-tap systems is not just logical, it’s profitable.
On-tap sparkling water systems champion environmental responsibility. Our systems eliminate the need for single-use plastics and glass bottles. The water that comes out of our systems is regulated by the Australian Drinking Water Guidelines. The water is further filtered to enhance the taste. Do you know where the water inside your bottles comes from or is bottled water industry a scam?
Crystella systems are a practical step towards reducing your carbon footprint, posing an eco-friendly, cost-effective, and better alternative to bottled water.
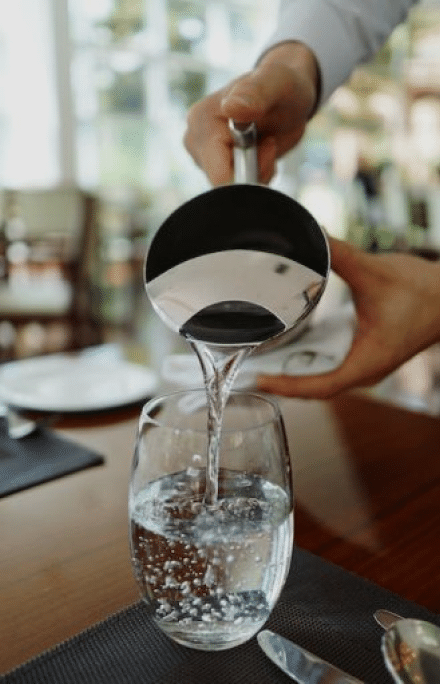
Enjoy an effortless operation with Crystella on-tap systems. They reduce the need for purchasing, restocking, and disposing of bottles, and free up much-needed fridge space. Crystella’s on-tap systems ensure a continuous supply of purified chilled still and sparkling water without the hassle.
Offering customisable, fresh, and eco-friendly on-tap sparkling water appeals to an increasingly environmentally conscious audience, helping you attract and retain clients and staff who prioritise sustainability. This increases your overall brand proposition and increased customer and staff satisfaction and loyalty.
“We used to offer Chilled water from containers that required refilling manually. Our staff were constantly having to fill water & ice into these containers to ensure water was always cold. The switch to Crystella was made easy by their efficient assistance in finding the correct compact on-tap solution in the tight space we required. The water is now always chilled and ready to pour. Crystella team were personable and professional. Repeat customers now complement us on making their experience a whole lot better.”
“We Let Crystella Look After Our Sparkling Water Whilst We Look After Our Business. "
“The Crystella rental solution, was an easy decision. On-tap sparkling water, always cold, always ready. We no longer have to plan ahead for sparkling water, it is always available. We now realise how much time, cost, energy we wasted on bottled Sparkling Water. We let Crystella look after our Sparkling Water whilst we look after our business. System is fully maintained with ongoing service. All we have to do is fill bottles with Sparkling water. Truly Sparkling water made easy.”
"The Switch To Crystella Was Made Easy By Their Efficient Assistance In Finding The Correct Compact On-Tap Solution In The Tight Space We Required"
“The Crystella rental solution, was an easy decision. On-tap sparkling water, always cold, always ready. We no longer have to plan ahead for sparkling water, it is always available. We now realise how much time, cost, energy we wasted on bottled Sparkling Water. We let Crystella look after our Sparkling Water whilst we look after our business. System is fully maintained with ongoing service. All we have to do is fill bottles with Sparkling water. Truly Sparkling water made easy.”
“The Day Crystella Approached Us Helped Us Save Costs And Protect The Environment"
“The day Crystella approached us helped us save costs and protect the environment. There is such a cost saving to the business as well as no longer having to store full bottles and dispose of all the empty bottles. Their service has been very prompt and efficient over the years. I have recommended to all my business associates to change to Crystella.”
Our sparkling water systems promote sustainability by eliminating the need for single-use plastic bottles. By providing a continuous supply of fresh on tap still and sparkling water, your establishment can significantly reduce its environmental footprint and contribute to a greener future. Our systems will eliminate single-use plastics and the carbon footprint associated with bottle logistics. Our ReCylinderprogram will further reduce your impact on the planet.
Crystella’s mission is to transform how water is consumed and served. Crystella embodies sustainability and practicality. Our cutting-edge, always on-tap systems deliver chilled still and sparkling water for offices, workplaces and the hospitality industry. Our refreshing water systems also eliminate the reliance on single-use plastic bottles, reducing plastic waste and minimising the costs associated with bottled water and their supply chains in Australia.
Our clients appreciate convenient on-tap drinking water and the added advantages of freeing up much-needed refrigerator space, reducing expenses on water purchases, and simplifying the administrative tasks associated with ordering and disposal.
By choosing Crystella, you’re choosing the sustainable choice for easy access to premium bubbly and still water and an environmentally friendly solution that boosts your brand’s reputation through sustainable practices. Say goodbye to plastic bottles of water and hello to Crystella’s sustainable solutions.
You can rely on Crystella. We are backed by Bromic a 40-year-old global Australian Business.